Wednesday
Nov102010

Latex bracelet

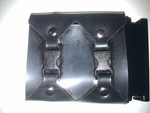
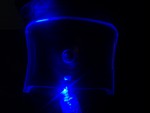
Latex braceletNifty new old bracelet made. Cut on the laser last week three versions; latex, leather and neoprene. New because I just made it but old because it’s an old design pulled out of the depth of my hard drive to try out on the laser.


Latex cut wonderfully, the leather and neoprene cut but not so nicely. The leather is thick moose hide. It could be cut but came out rather burnt to get through the leather. The neoprene also was troublesome. It has a high carbon content (chemical resistant industrial grade) it would cut part way through but I did not have the time to tune things to cut it nicely.


Pic is the latex one with a simple black insert
leather one has an aluminium insert
Plan for the neoprene is a stainless plate.

Wednesday
Oct202010

Lasers are fun.

So have joined up with a grate group called site3 (http://site3.ca). The motivation was use of a laser engraving machine but i am also finding it awesome to get to know a smart, creative bunch of people.


So on to the show.

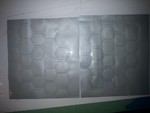
Honeycomb appliquelast night after an hour of testing and tuning; I was able to cut sheet latex without cutting the tape backing. 

The latex is to be an applique on a latex garment. the point in tape backing is so that i can clean and glue in one piece and then just stick it down without stretching or distorting of the piece.


Boot armor testThe next pic here is a test for glowing armor that will be attached onto my boots. This is made from 1/4'' acrylic and each panel will have one blue LED embedded into it.


Tuesday
Sep142010

Tiny Gamer

latest project nearing complete:

The tiny Game machine.

This bit of fun has been it the works for what seems like an age.

This great little game machine is built on a zotac mini-itx platform LGA 775 GF9300; Intel Q8200; 4Gb RAM; OCZ Vertex 60Gb; Enermax Liberty DXX ELT500AWT 500w PSU; and the big one: Palit GeForce GTX 460 Sonic 1024MB. all crammed into a tiny Lian-Li PC-Q07 box

first try at the on button: the GPU was up to 80c in minutes (quite expected). Next pulled off the side and flipped the case upside down. This brought the running temp down to 73c under load. finally i added 4x 4cm fans for intake and one  blower at the top for exhaust and this brings the temp down to 61c under the same load.

more later and pics.

Palit GeForce GTX 460 Sonic 1024MB

Wednesday
Aug042010

Vac Bed breathing rig

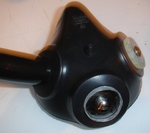
For the breathing rig I started with a half mask that I had lying about. This case worked out exceptionally well. It is the MSA Comfo classic half mask. (pic stolen from MSA web page)


First thing was to remove all the hardware from the mask. This was quite simple just stretch the mask over the plastic parts and they pop right out.

The strap bracket is held in place with a single rubber pin. Just push this out of the strap bracket.


Now we have a nice rubber mask with three holes; one for a tube and two to plug.

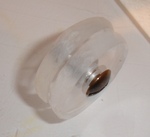
For the plugs I dug out a hole saw and some acrylic scrap.

  • Made four circles;
  • sand them down (sharp edges galore from the hole saw).
  • Combine two circles with a Chicago screw and we have a plug 


For the breathing tube I used ½’’ id black vinyl tubing. This is a bit stiffer then I would like but I did not want it to crush under vacuum.

The pic here has the tube in directly; I added a right angle fitting so that things would fit better when in the bed. This worked well but does leak so I will be adding a latex gasket around the fitting to prevent air loss at this junction.

For the tube to exit the vac bed I decided to have it go through the frame.


Simply drilled two holes (hole saw) in the pvc frame to allow the tube to pass; then added a hole/gasket in the envelope of the bed (placed to match the frame).


Friday
Jul302010

Printer redirect for remote desktop

ms link: http://support.microsoft.com/kb/302361/en-us

content:


Follow these steps:

  1. Click Start, click Run, type regedit, and then click OK.
  2. Locate and then click the following key in the registry:
    HKEY_CURRENT_USER\Software\Microsoft\Terminal Server Client\Default\AddIns\RDPDR
  3. On the Edit menu, point to New, and then click DWORD Value.
  4. Type FilterQueueType, and then press ENTER.
  5. On the Edit menu, click Modify.
  6. Type FFFFFFFF, and then click OK.
  7. Close the Registry Editor.
  8. Restart your computer.

This enables all ports on the client to be redirected.